Thursday, October 2, 2014

Kitchen Progress

Ok, so my kitchen was actually clean and I thought I should get some photos. I like how I forgot to unplug my kitchen appliances so you get lots of views of their nice cords...classy.

We moved the large lanterns we had over the bar and went back to the recessed lights because they just competed too much with the open shelving. We are going to use one over the kitchen table and put the other one somewhere else.

We finally got our counter stools from overstock and I am loving them. They are really sturdy, which is nice since we have small kids, and they were already assembled when we bought them. 


We finally got our awesome rough sawn lumber shelving outgassed and in the house. For some reason they show up really yellow in these pictures but they are more of a brownish in person. I absolutely love them! 

I have been looking around for cafe curtains but they are apparently really hard to find these days. Instead of ordering some, I used some scrap drop cloth from my kitchen chair re-covering project and just attached them to the cafe rod with clips and left the ends frayed. They actually look really cute.


I absolutely love the fridge cabinet my husband built. Not only does it make the fridge feel smaller, it gives me lots of space to cram stuff I don't use much in and behind my baskets. I am still trying to figure out what I want to put on the range hood shelf. I think I am going to make a greenery wreath out of some clippings from a bush we have outside. Hmmm....we'll see how that goes.


We don't have nearly as much counter space in this house as the last, so we knew we couldn't put all of our appliances on the countertop. However, the microwave just seemed too bulky for the cabinets. I felt like a better solution was to keep it on the counter and create a shelf for the toaster oven since it would blend in a little easier with the cabinets. My husband put in a new outlet there when he installed the lower shelving. I think it was definitely the right choice and it's been really functional.


We should have the kitchen table and chairs done within the next few days and I will be able to post pictures of the eat-in side of our kitchen. Just for fun, here's another before and after: 



Sunday, August 24, 2014

New Kitchen Renovation in Progress


So I normally hate posting projects that aren't finished, but with the craziness of our lives right now, people asking me to post pictures, and having just had baby #3 last week, I'll just post where we're at right now. 

Here is the picture of our kitchen before:


... and here is the kitchen currently...


Dave raised the upper cabinets to the ceiling and added the open shelving underneath. He put in a real range hood and added a shelf over the stove. He also built the cabinet around/above the fridge and painted all the cabinets.


We replaced the old countertop with black honed granite and added the subway tile backsplash.


We removed the cabinet to the right of the window to use in the play room and will be replacing it with rustic wood open shelving. I'll post later about each detail and sources as well as paint colors. We still have a bit of work to do and need to refinish a table for the eating area. But for now, I have to go change a diaper :-)

Tuesday, May 20, 2014

Kitchen Planning 2: Kitchen Elements

Here are the elements we hope to use in our (badly photo edited) dream kitchen. 


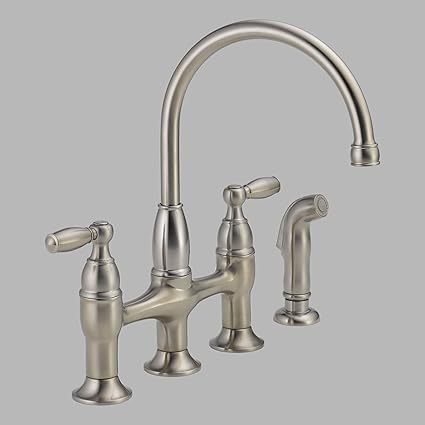
We are trying to keep to a pretty tight budget in order to paint most of the house, modify the kitchen cabinets, and add granite. We found an awesome deal on a Delta faucet that has been discontinued (have I ever mentioned how much I love the fact that companies discontinue things?).


Delta Dennison Bridge Kitchen Faucet
from Amazon 
$100


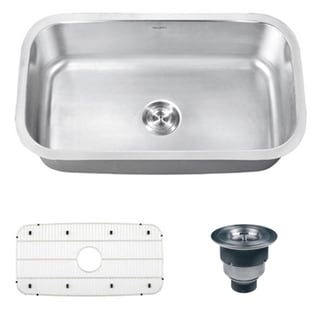
A pretty sweet deal on a sink...


Ruvati 16-gauge Steel 32-inch undermount kitchen sink
from Overstock 
$200


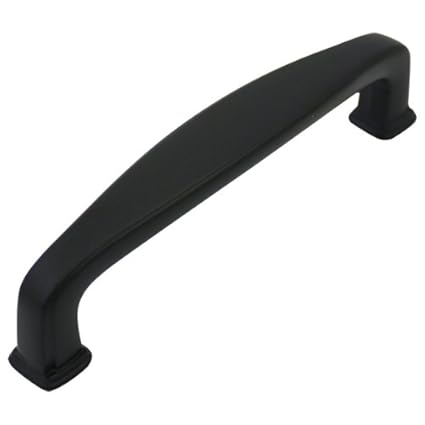
And hardware that I like and found at a reasonable price...


Cosmas Flat Black Cabinet Pull
from Amazon 
$24.95 for a 10 pack


Cosmas Flat Black Mushroom Knob
from Amazon 
$32.95 for a 25 pack


Sterling Hardware Elegante Shelf Bracket
$1.79 (7 inch) to 2.39 (10 inch)


Monday, May 19, 2014

New Kitchen Project Planning

Well, we're moving once again. After seven years away from family, my husband landed a great job back home in North Carolina. We have loved living in Alabama, but with the kids growing up and another on the way, it's nice to be home. We are about to close on a house and I'm currently finalizing paint colors and kitchen planning. 

We are trying to plan the perfect kitchen on a budget, working around the existing tan tile flooring. Our plans are to raise the upper cabinets to the ceiling, paint them white, and add a shelf underneath. We will also be painting the lower cabinets a warm gray, adding a tile backsplash, modifying the cabinetry around the fridge, and putting in new granite countertops. Hopefully this will all (or mostly) be happening in the next three weeks or so, before we move in. That's a pretty small time frame for us since we normally live in our projects and take our time. We'll see how it goes :-)


I was searching around for the perfect inspiration kitchen and found an amazing one at Our Vintage Home Love:


Hello, gorgeous kitchen! I absolutely love the warmth they brought to this kitchen by adding the rustic wood shelving and bamboo shades. I also love that they don't have a farmhouse sink, which we would absolutely love, but isn't in the budget this time around. This photo gave me the confidence that we can still get an awesome cottage kitchen look without having to have the farmhouse sink. Again, I cannot express how much I love this kitchen and what a great job they did.


Our first big decision is what kind of granite we want. Here are my badly photoshopped images to give us an idea of what each would look like. Our top two choices are honed black with the lower cabinet similar to our inspiration kitchen, or cotton white with darker lower cabinets.


I didn't feel that the rustic wood shelf looked as good with the white granite so I added a white floating shelf instead.


Though I absolutely loved the look of the white granite in the store, I think I like the more casual charm of the black granite. I definitely wanted to do either darker gray lower cabinets or a dark countertop to add some contrast with the light tile floors and I think the darker countertop gives me the look I want.

Any opinions?


Monday, April 28, 2014

Gluten Free Almond Meal Chocolate Chip Cookies


So I don't normally do food posts, but these are seriously yummy... 


Almost two years ago I found out I had a problem with gluten. About six months ago I found out I also have a tapioca allergy, which excludes most gluten free flours and bakery mixes from my diet. I'm always in search of a good cookie recipe since chocolate chip cookies are my FAVORITE! I found an awesome one over at Meaningful Eats, and have since played with it until arriving at my own version. This recipe makes about 30 cookies.


  • 1/2 cup butter (one stick) softened
  • 1/4 cup peanut butter (or almond butter)
  • 1/4 cup grapeseed oil (or whatever oil you like)
  • 3/4 cup brown sugar (or coconut palm sugar, or whatever)
  • 2 tsp. vanilla extract
  • 2 large eggs
  • 1 and 1/2 tsp. baking powder
  • 1/2 tsp. salt
  • 3 cups almond flour
  • 1 cup shredded coconut (sweetened or unsweetened)
  • 1/2 cup ground flax seed
  • 1 and 1/4 cups chocolate chips
  • Whatever other little fun goodies you want to add on top (I used m&ms this time)

  1. Preheat your oven to 350 degrees.
  2. Cream together butter, peanut butter, grapeseed oil, and brown sugar in a mixer until well combined.
  3. Add eggs and vanilla and mix until blended.
  4. Add baking powder and salt, mix.
  5. Add almond flour one cup at a time and mix.
  6. Fold in coconut, flax seed, and chocolate chips with a spoon or spatula.
  7. Drop dough onto a baking sheet covered with parchment paper and press down the cookies with your spoon. You can put them about an inch apart as they don't spread too much once you have pressed them down. 
  8. Bake for 12 minutes or until edges are slightly brown. Allow to cool at least 5 minutes on pan.
  9. Try not to eat all of them immediately :-)


Jam Hands